Git - Daily work commands
This post will give a summary of the git commands and a parallel view of the tree. It is not another tutorial. There are many really good ones.
PS: The trees created here was done by gitHub School.
First of all...
- Config the account
$ git config —global user.name “Example”
$ git config —global user.email “example@example”-
Each commit is uniquely identified (SHA1 hash): 79fc79530ecf44809d0aaeb93830ec23a5254d66
-
You just need the first seven values in hash code to give as reference in git commands. For example, you just need 79fc795 to do some reference to the previous commit.
Starting by Local works
Here is a summary about the first steps. After the Step 4 you will have the folder '.git'.
# 1 Create your project folder
$ mkdir MyTestProject
# 2 Go inside
$ cd MyTestProject
# 3 Create a file
$ touch myFirstFile.txt
# 4 Init the git repository
$ git init
# 5 Adding file to the staging area
$ git add myFirstFile.txt
# 6 Commit your file locally
$ git commit -m “First commit”
# 7 See the history
$ git log
# 8 See the status
$ git status

# History in the console
commit 20d9288c202376bc7230f1e08becfa60ac1d0f7c (HEAD -> master)
Author: Name Last  <example@example>
Date:   Mon Feb 21 09:20:40 2022 +0100
    First Commit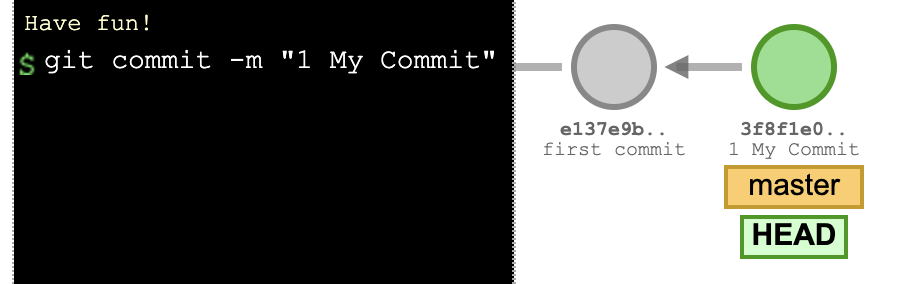
Now, let's improve the scenario adding a new file.
# 9 Create a second file
$touch mySecondFile.txt
# 10 Add to stage area
$git add mySecondFile.txt
# 11 Commit the file
% git commit -m "Second Commit"
# 12 See the history
$ git log

# History in the console
commit 79fc79530ecf44809d0aaeb93830ec23a5254d66 (HEAD -> master)
Author: Name Last  <example@example>
Date:   Mon Feb 21 09:49:30 2022 +0100

    Second Commit

commit 20d9288c202376bc7230f1e08becfa60ac1d0f7c
Author: Name Last  <example@example>
Date:   Mon Feb 21 09:20:40 2022 +0100

    First Commit
And here is how supposed to be the tree.
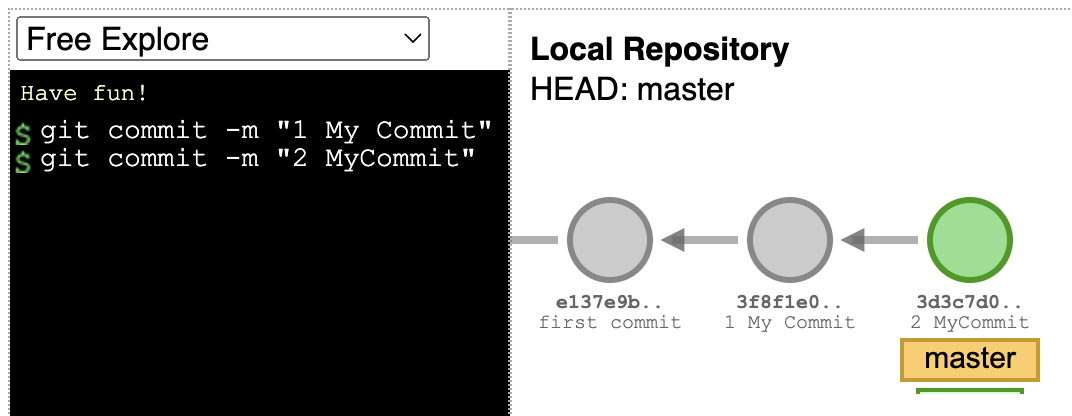
Now, let's change both files (adding any text inside the files) and commit them.
# 13 Add all files to the staging area
$git add .
# 14 Commit them
% git commit -m "Third Commit"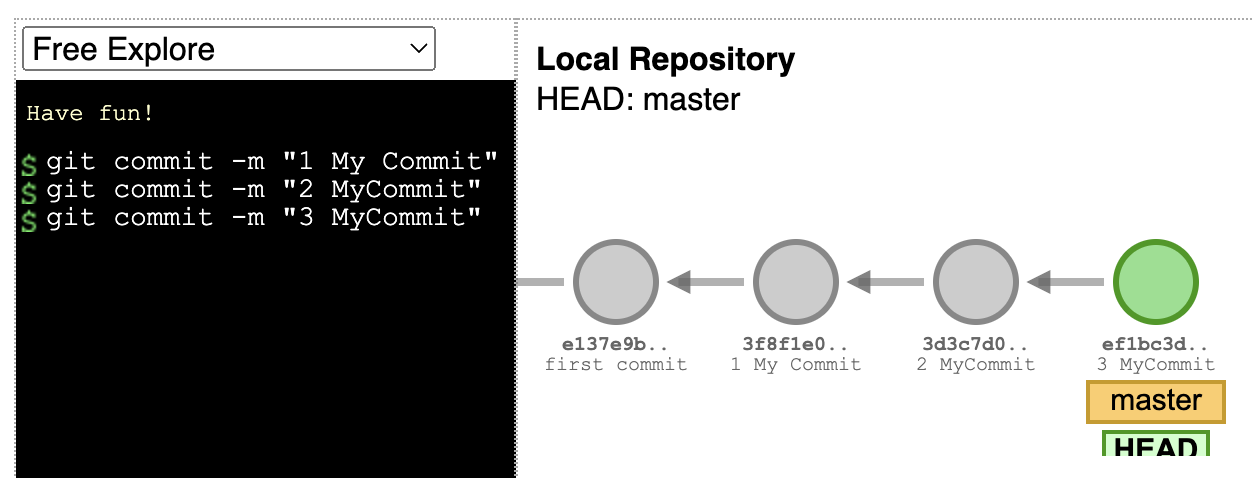
Next level ... let's revert the commits.
git revert is used to record some new commits to reverse the effect of some earlier commits (often only a faulty one). This requires your working tree to be clean (no modifications from the HEAD commit).
# 15 Remove last modification
$git revert -n HEAD
# 16 Commit the reverted file
$git commit -m "Reverting the third commit"
# 17 Returning modification
$git revert -n HEAD
# 18 Commit the second revert
$ git commit -m "Reverting the revert"
# 19 See the log
$ git log

# History in console
commit 457f13d5b8649f59587979d30af20f0a72590118 (HEAD -> master)
Author: Name Last  <example@example>
Date:   Mon Feb 21 10:18:21 2022 +0100

    Reverting the revert

commit 12c4fda1950c7730c82d5b2dac873bc278d9d3e5
Author: Name Last  <example@example>
Date:   Mon Feb 21 10:15:14 2022 +0100

    Reverting the third commit

commit d75b40a8f1be78ba3abbb6d206ac82283ca9bc65
Author: Name Last  <example@example>
Date:   Mon Feb 21 10:01:18 2022 +0100

    Third Commit

commit 79fc79530ecf44809d0aaeb93830ec23a5254d66
Author: Name Last  <example@example>
Date:   Mon Feb 21 09:49:30 2022 +0100

    Second Commit

commit 20d9288c202376bc7230f1e08becfa60ac1d0f7c
Author: Name Last  <example@example>
Date:   Mon Feb 21 09:20:40 2022 +0100

    First Commit
The step 15 will go back the files to the state before your changes (original files) and the Step 17 return your changes (changed files).

If you want to throw away all uncommitted changes in your working directory, you should see git-reset.
# 20 Reset your third commit
$git reset d75b40a --hard
# 21 See the log
$git log

# History in console
commit d75b40a8f1be78ba3abbb6d206ac82283ca9bc65 (HEAD -> master)
Author: Name Last  <example@example>
Date:   Mon Feb 21 10:01:18 2022 +0100

    Third Commit

commit 79fc79530ecf44809d0aaeb93830ec23a5254d66
Author: Name Last  <example@example>
Date:   Mon Feb 21 09:49:30 2022 +0100

    Second Commit

commit 20d9288c202376bc7230f1e08becfa60ac1d0f7c
Author: Name Last  <example@example>
Date:   Mon Feb 21 09:20:40 2022 +0100

    First Commit
The step 20 move the pointer the a specific position on the tree. You just need the first seven first number of the commit's hash. Bellow is how is supposed to be the tee.
Change the branch
Until now, all the works is happening using the master branch. Now, let's create a new one.
# 22 Create a new branch
$ git branch mynewbranch
# 23 Change the head to the new branch
$ git checkout mynewbranch
Let's create a new file to this branch.
# 24 Create a new file
$ touch newfile.txt
# 25 Adding to the stage area
$ git add newfile.txt
# 26 commit new file
$ git commit -m "Adding new file"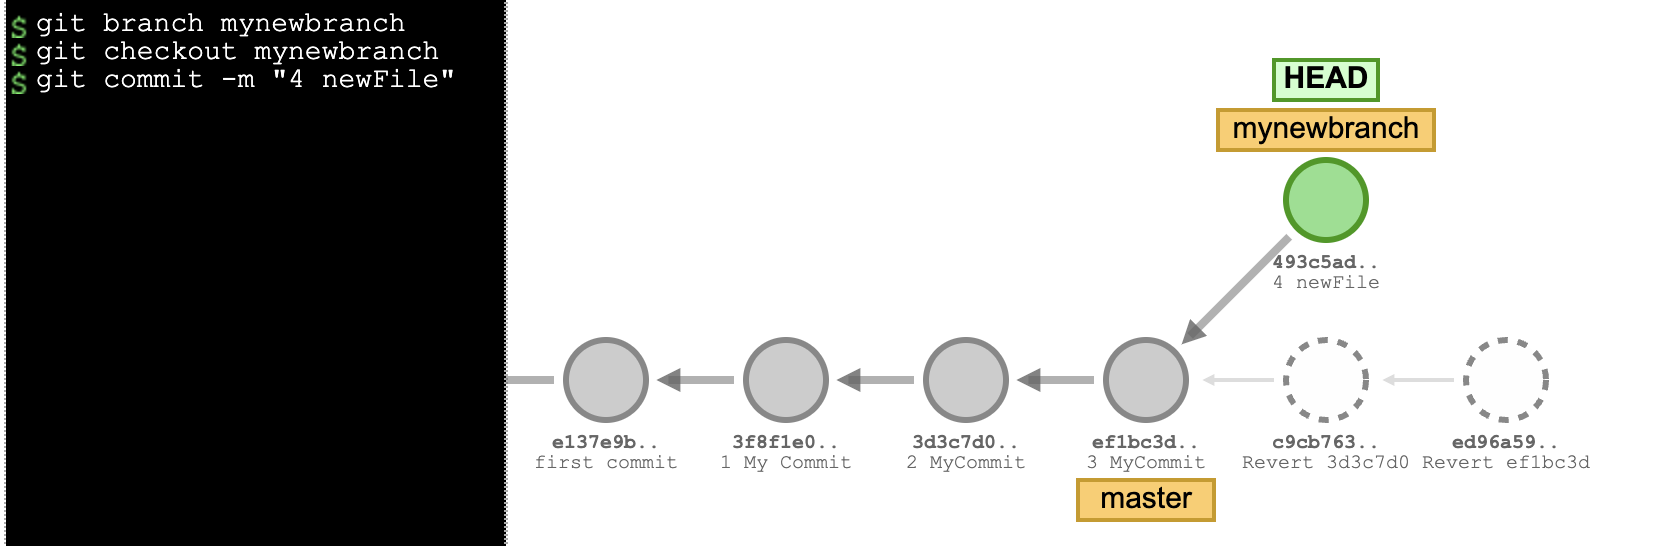
Merge branches
You need to be on your branch target. Here, we will merge from the newbranch to the master. So, checkout to the master and let's go.
# 27 checkout to target
$ git checkout master
# 28 merge from new branch
$ git merge mynewbranch
# 29 Console log
$ git log

#History in Console
commit 803023ed0a9f3d2fb9f6ce398e73e7e8cf95e1b2 (HEAD -> master, motivation)
Author: Name Last  <example@example>
Date:   Mon Feb 21 13:13:17 2022 +0100

    adding new file

commit d75b40a8f1be78ba3abbb6d206ac82283ca9bc65
Author: Name Last  <example@example>
Date:   Mon Feb 21 10:01:18 2022 +0100

    Third Commit

commit 79fc79530ecf44809d0aaeb93830ec23a5254d66
Author: Name Last  <example@example>
Date:   Mon Feb 21 09:49:30 2022 +0100

    Second Commit

commit 20d9288c202376bc7230f1e08becfa60ac1d0f7c
Author: Name Last  <example@example>
Date:   Mon Feb 21 09:20:40 2022 +0100

    First Commit
Here is the tree after the merge to master.

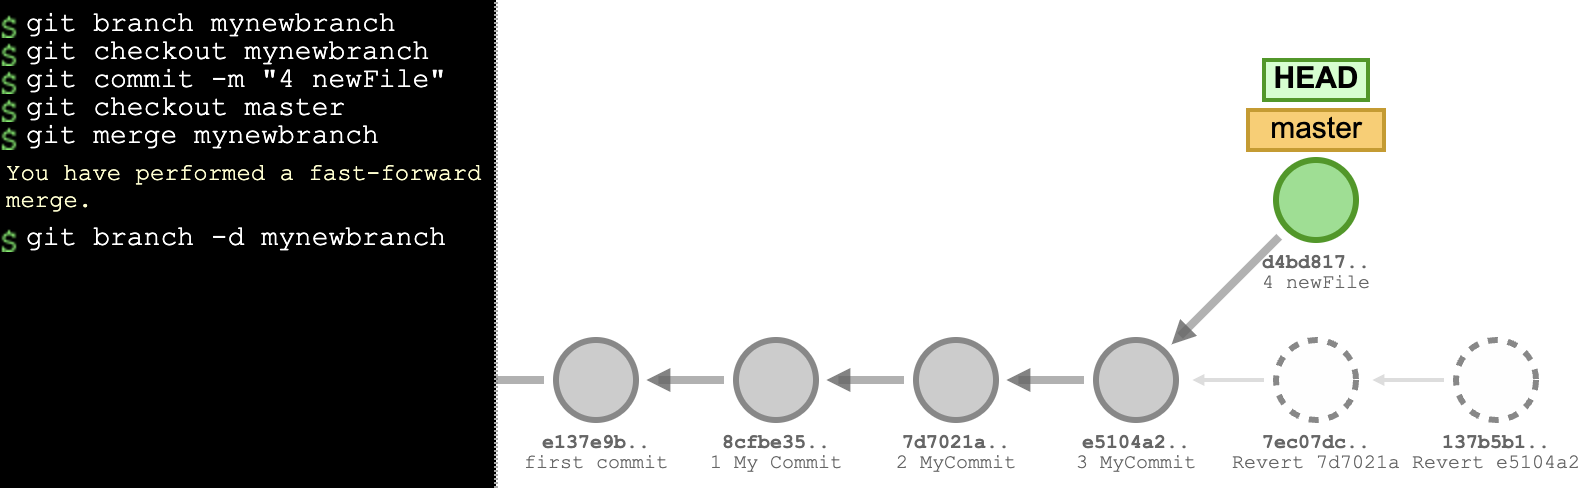
If you want to remove the branch you just need use the attribute 'd'. And here is the tree after that.
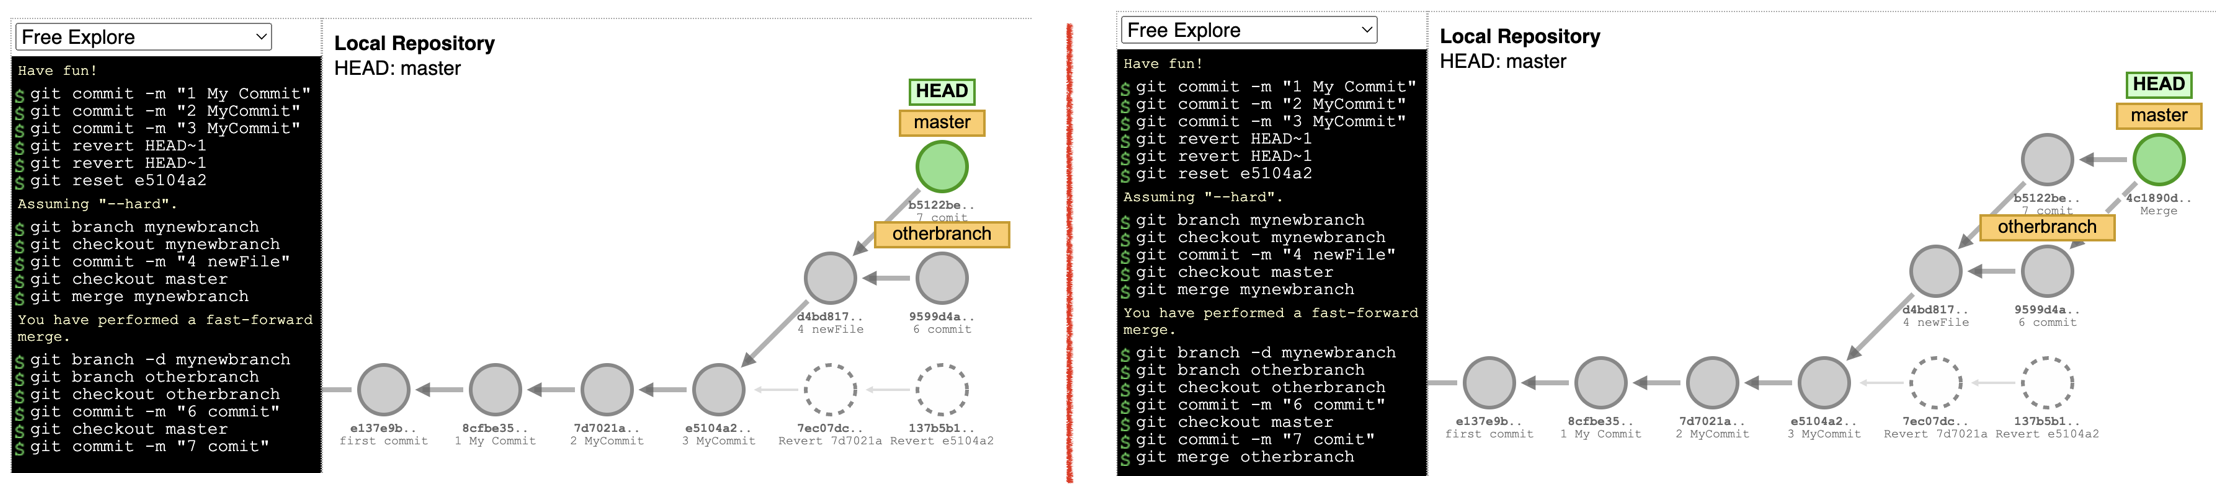
The first example show the case where the new branch has everything the master. The image below show another example where the master has a new commit and the other branch also has different commits.
In case happen changes in the same file in both branches the console will the the conflict's message. You just need to open your file, fix that and commit again. The git diff show in the console all the changes in the files.
Working with Remote Repositories
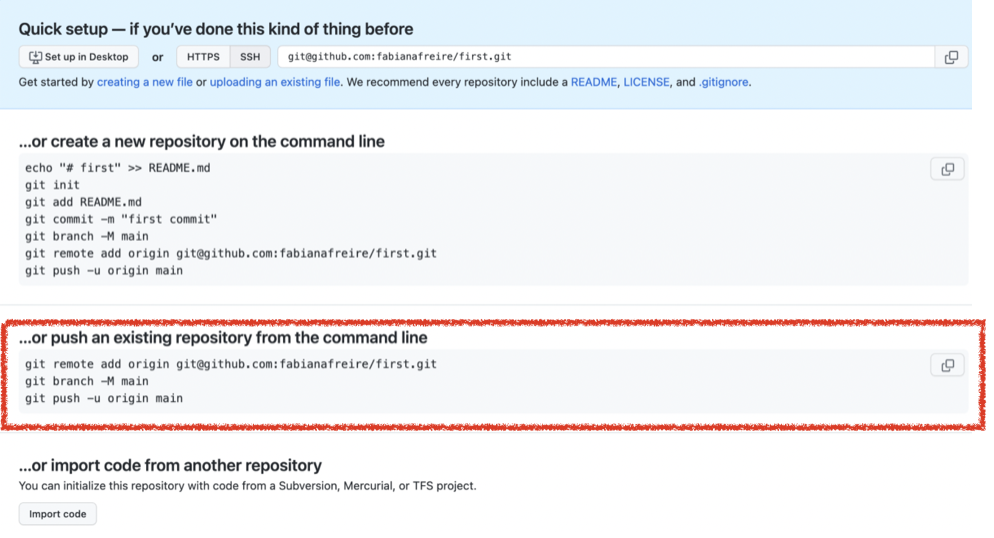
When you create the repository remotely the GitHub show you all the directions to synchronize it with a local repository. You just need follow it. For example used in this post you should follow the second option.
However, if you have more then one branches and want push all of them you can use git push --all origin. In case you want let the master branch default you can write git push -u origin master and the last time you just need to write git push.
Other case is when exist the project in the remote repository and you want just use it. For that you have to clone the repository.
# 30 Clone the repository - copy the url from git repository
$ git clone https://github.com/fabiana2611/api-java.git
# 31 Downloads the changes from remote before push your changes
$ git pull
# 32 Upload your changes to remote
$ git push
Before the pull, you can use stash to store locally the changes you are not prepared to commit yet. And put back the code using git stash pop. If you want do a clean commit you can use git squash.
Probably will be necessary configure the key ssh to use the remote repository. One possibility is you have to generate new SSH key locally and copy in the github repository. Other case you can create in your repository (Settings/Developer Settings/Personal access tokens) and copy locally when try to be logged.
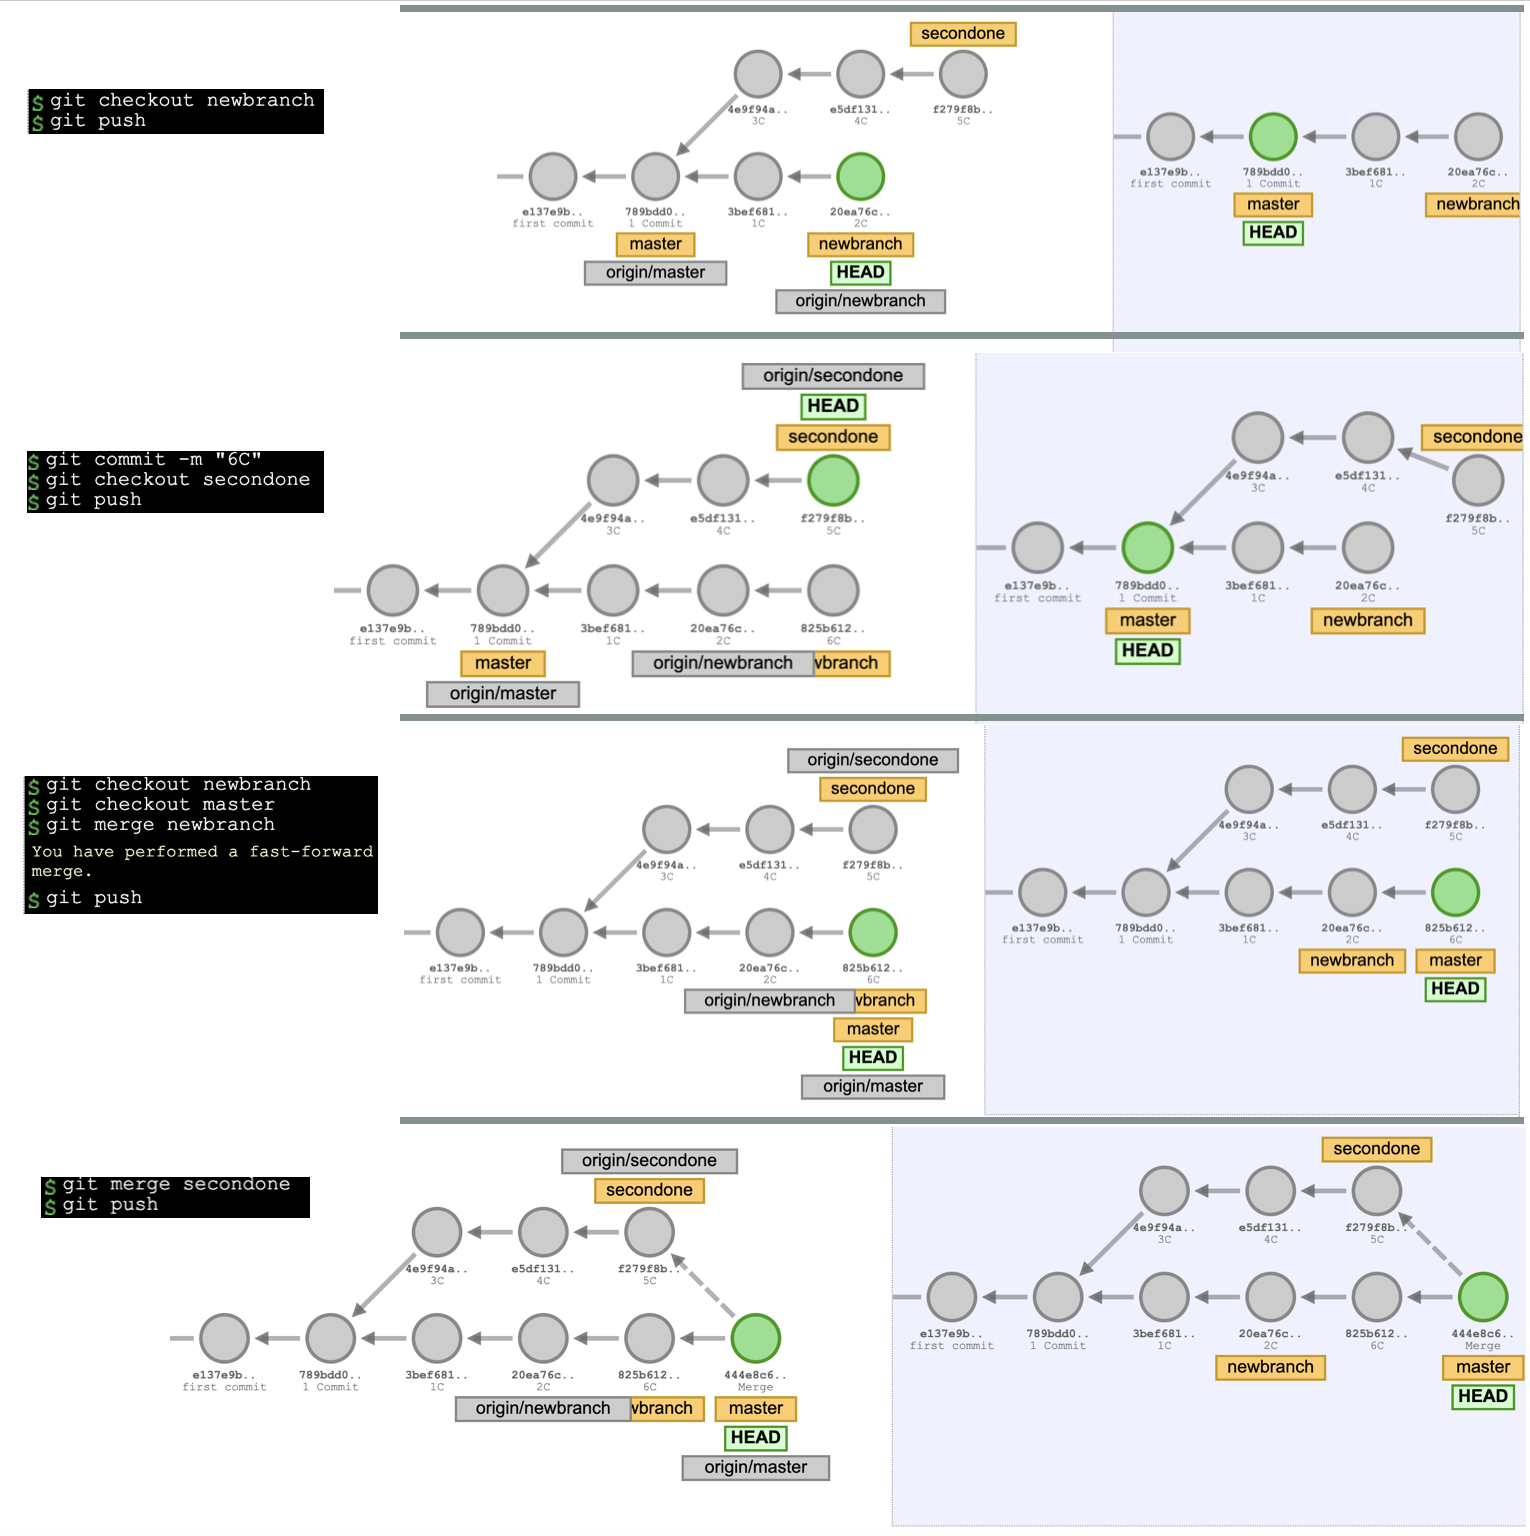
Example of the Tree
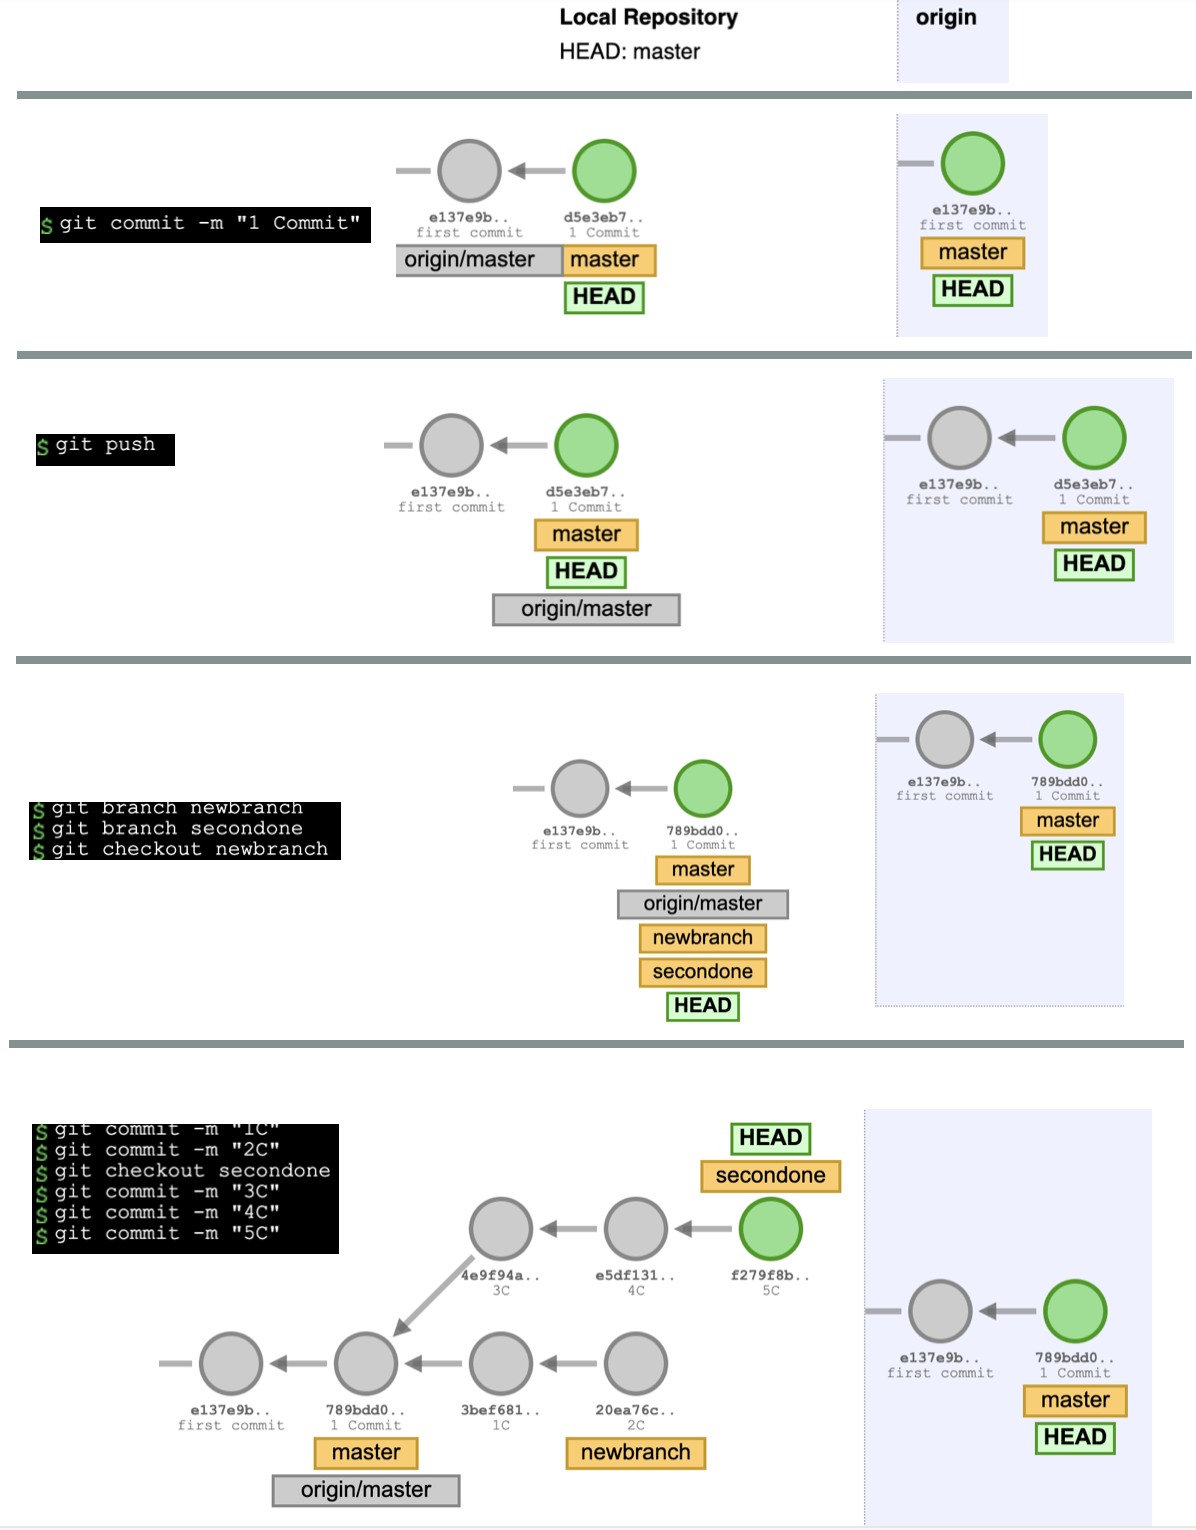
Here are the steps regarding an example of using remote repository. Below you will see commits, merges and push to remote repository. Pay attention: The HEAD in remote repository is changed only after the merger.
Reference
- Git-school.github.io/visualizing-git/#free
- Udemy: Learn Git by Doing: A step-by-step guide to version control (Codingdojo, Inc)
- Video Fabia Akita: https://youtu.be/6Czd1Yetaac