NestJS - API (Axios/Swagger)
This post has some notes and the code I did while studying nestjs. My references is the nest page. The code used in this post you can find the project api that you can access here.
Axios
Axios is a resource from Http Module to handle http calls. It is done by HttpService which exposes Axios-based methods to perform HTTP requests. The responses are AxiosResponse wrapped in an Observable object.
$ npm i --save @nestjs/axios
$ npm i axios
After the installation is necessary to import the module where it is necessary to use. If you need configure specific sets you can add when declare the HttpModule or create a external file.
// Sync
HttpModule.register({
      timeout: 5000,
      maxRedirects: 5,
    }),

// Async
HttpModule.registerAsync({
  useFactory: () => ({
    timeout: 5000,
    maxRedirects: 5,
  }),
});

// Injecting dependencies
HttpModule.registerAsync({
  imports: [ConfigModule],
  useFactory: async (configService: ConfigService) => ({
    timeout: configService.get('HTTP_TIMEOUT'),
    maxRedirects: configService.get('HTTP_MAX_REDIRECTS'),
  }),
  inject: [ConfigService],
});

// External file
HttpModule.registerAsync({
  useClass: HttpConfigService,
});
In your service, the HttpService should be declared inside the constructor then use it. The return is a observable.
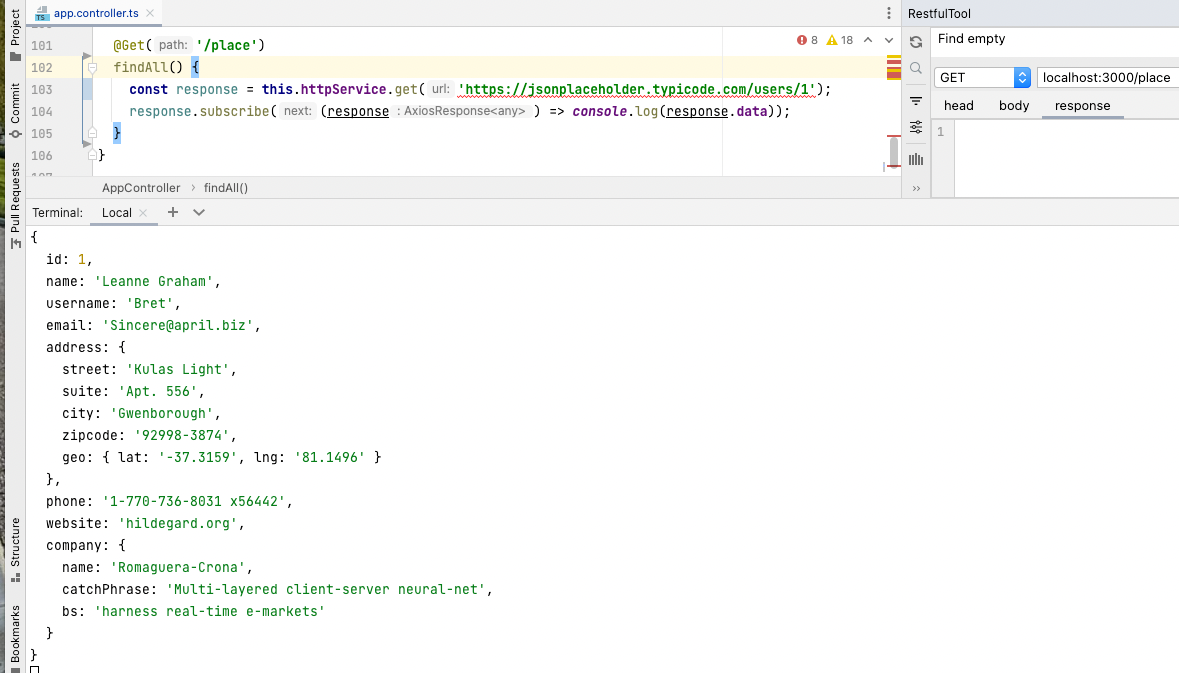
There are two possibilities to use that response: using the observable or using the axios reference to manipulate the data, for example.
In the first example below the result is printed in the console.
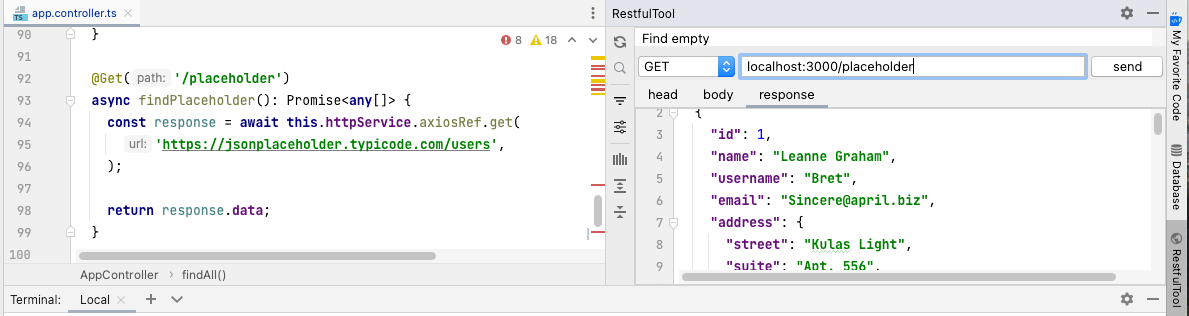
The second example shows the return from data printed on the browser.
Swagger
I already written about swagger in this post. It was focused on Java but it's the same idea. Here it's focused on using it with nestjs.
The <OpenAPI specification is a language-agnostic definition format used to describe RESTful APIs.
Swagger is a set of open-source tools built around the OpenAPI Specification that can help you design, build, document and consume REST APIs.
To use swagger inside nest project you have to install it. Here is installed the express version.
$ npm install --save @nestjs/swagger swagger-ui-express
// Optional plugin
$ npm install --save opt-in
The configuration is done in two files: the main.js and nest-cli.json. Inside the main file you can add generic information such as description, version, tag, security and cookie. The nest-cli will let available other configurations as the use of pluglin opt-in to avoid boilerplate as use of the comments to create the documentation instead add new annotations.
Here is an example of configuring main file.
- The security lines are commented to show different ways to do it.
- The DocumentBuilder helps to structure a base document
- Document (returned by the SwaggerModule#createDocument() method) is a serializable object
- The SwaggerModule automatically reflects all of your endpoints.
async function bootstrap() {
const app = await NestFactory.create(AppModule);
const config = new DocumentBuilder()
.setTitle('API Restful Study')
.setDescription('The API Project Description')
.setVersion('1.0')
.addTag('rest-api-study')
// .addSecurity('bearer', { type: 'http', scheme: 'bearer' })
// .addBearerAuth()
// .addOAuth2()
// .addCookieAuth('optional-session-id')
.build();
// Global doc
const document = SwaggerModule.createDocument(app, config);
SwaggerModule.setup('api', app, document);
// Multiple
const msgDoc = SwaggerModule.createDocument(app, config, {
include: [MessagesModule],
});
SwaggerModule.setup('api/messages', app, msgDoc);
await app.listen(3000);
}
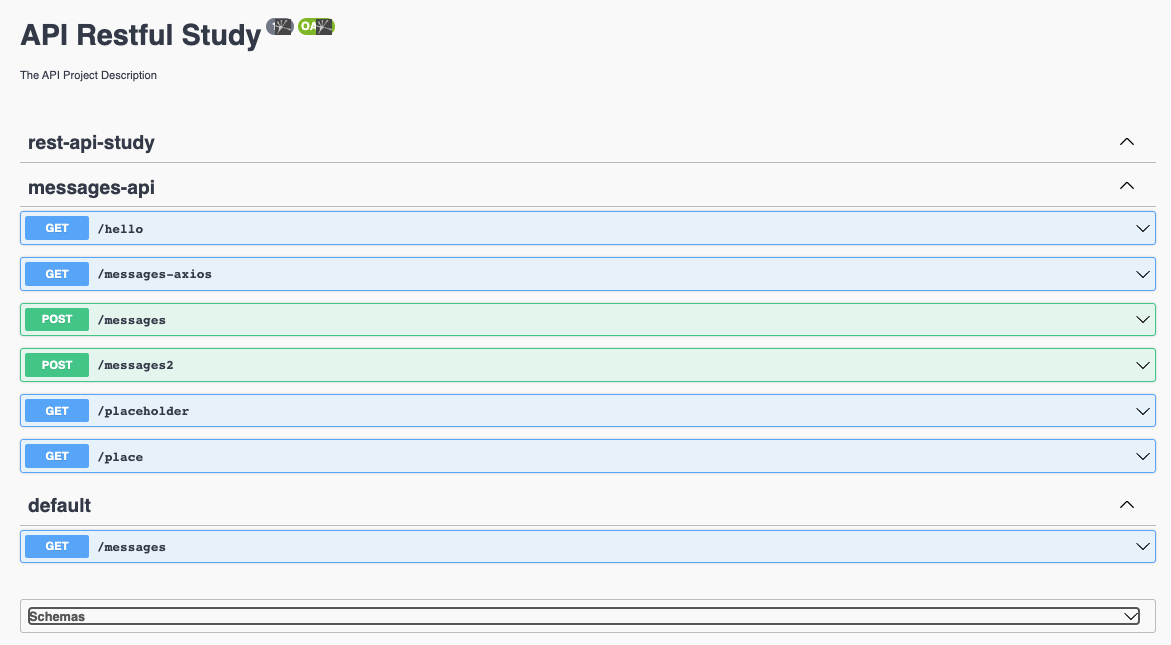
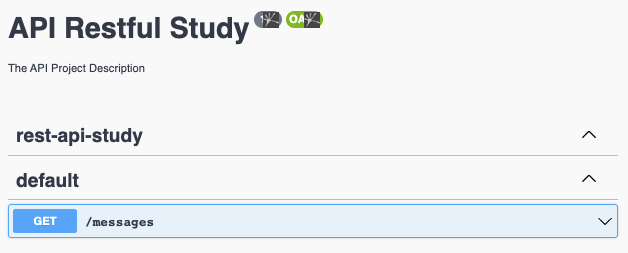
bootstrap();This example shows the possibility you have different pages of the docs: a global that will list all endpoints, and a second page regarding only the endpoins inside the message module.
 |
 |
Here is the example to configure the nest-cli file to use comments to create the documentation.
"compilerOptions": {
   "plugins": [
     {
       "name": "@nestjs/swagger",
       "options": {
         "introspectComments": true
       }
     }
   ]
 }
Example
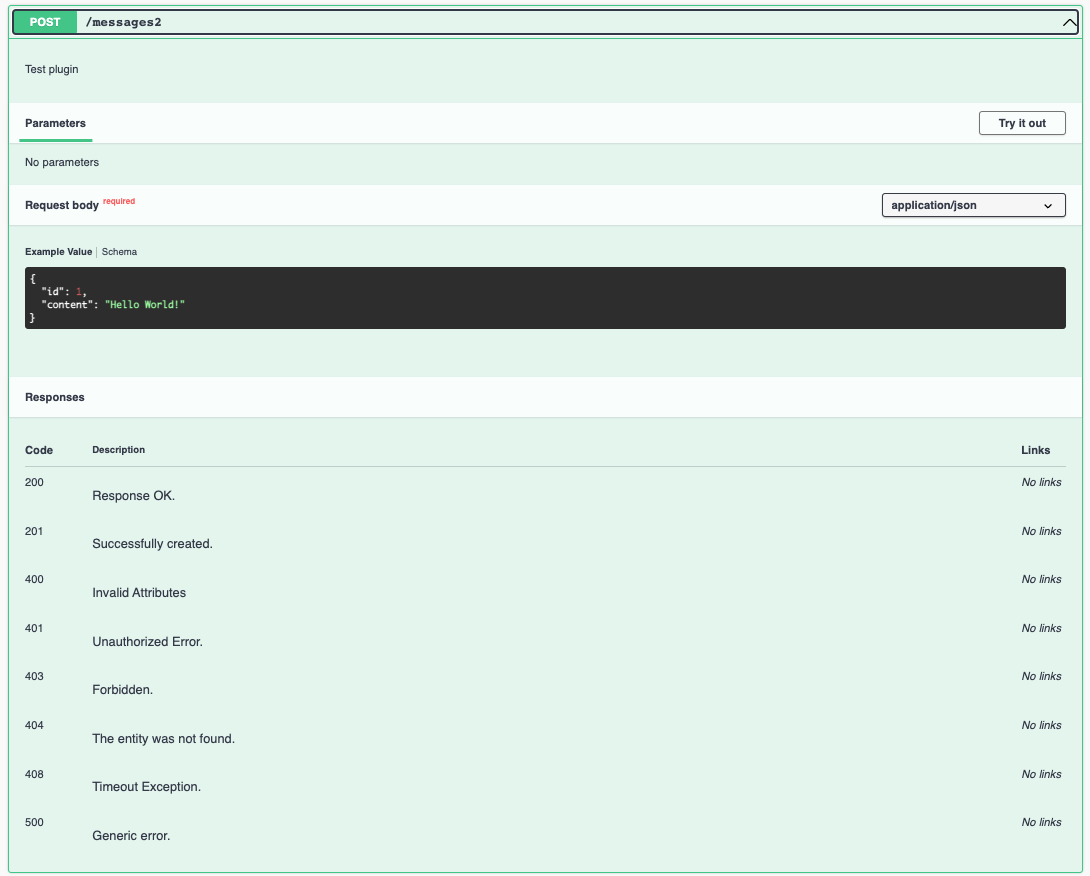
Now we have a simple example of how to use the annotations from swagger which will be used to create the documentation.
The tag upside the class will be used to group the documentation, for example. The consume and produces annotation indicate the type of data that will be manipulated by that endpoint. The body describes what is necessary to that endpoint and you can add examples.
@ApiTags('messages-api')
@Controller()
export class AppController {

  /**
   * Test plugin
   * @param body
   */
  @Post('messages2')
  @ApiOkResponse( { description: 'Response OK.' } )
  @ApiCreatedResponse({ description: 'Successfully created.' })
  @ApiForbiddenResponse({ description: 'Forbidden.' })
  @ApiBadRequestResponse({ description: 'Invalid Attributes' })
  @ApiRequestTimeoutResponse({ description: 'Timeout Exception.' })
  @ApiUnauthorizedResponse({ description: 'Unauthorized Error.' })
  @ApiNotFoundResponse({ description: 'The entity was not found.' })
  @ApiInternalServerErrorResponse({ description: 'Generic error.' })
createMessage2(@Body() body: MessageEntity) {
  return this.messagesService.create(body.content);
}
Thanks to the plugin, the comments will be used for documentation and you don't need to add more annotations. In the same way, all the descriptions you add inside the MessageEntity will be recognized and added to the documentation. Pay attention in the next image. The example Value is created from information inside the MessageEntity.
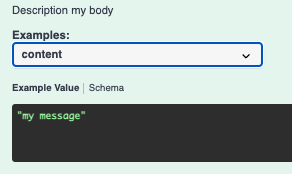
If you use the body annotation. It will be changed.
@ApiBody({
   description: 'Description my body',
   type: MessageEntity,
   examples: {
     id: { value: '1' },
     content: { value: 'my message' },
   },
}) |
 |
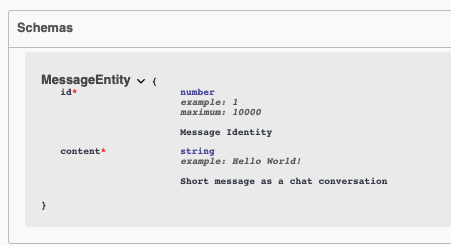
Plugin will identify all the files with *entity.ts and .dto.ts to do the annotations. Then, those entities don't need the @ApiProperty() annotations anymore. However, if you need to override them you just need to start to use the annotation where you want. Also, the annotation from 'class-validator' (@Max) will be used to create the documentation.
export class MessageEntity {
  // @ApiProperty({
  //   description: 'Identity',
  //   nullable: false,
  //   type: Number,
  //   required: false,
  // })
  /**
   * Message Identity
   * @example '1'
   */
  @Max(10000)
  @IsNumber()
  id: number;

  // @ApiProperty()
  /**
   * Short message as a chat conversation
   * @example 'Hello World!'
   */
  @IsString()
  content: string;
}
And the doc will be created like that:
PS: Always change the documentation you have to build again the project. It's not enough only to save and see the app restarting.