Gradle - an overview
The gradle comes to solve the problem of building and deploing the application in a consistent and automated way. It is a framework for building applications: Builds deployment artifacts and Manages dependencies.
Ant and Maven were based on XML. The Gradle use the programming language groovy.
Key features:
- Build file: readable instruction, declarative and programatic. Default name is "build.gradle".
- Construct a "Graph" of Tasks: tasks are detailed build steps. Gradle read the file, get the tasks and create a DAG. Gradle represents the DAG in memory. Each node of the graph represents a task.
- Executes the Tasks in order and each output from a tasks is used by the next task. Tasks are a domain object of a build. The domain objects can be inspected and modified from the build script.
- Manage Dependencies: external and internal/transitive dependencies
- Use repositories to handle the dependencies
- Self-Updating: auto-retrieval of new versions of Gradle and dependencies.
Terminology:
- Project: models a software component
- Build Script: automation instructions
- Task: executable automation instructions.
First Test
Let's install the Gradle. Here I used sdkman.
# install
$sdk install gradle
$gradle -v

# create the project folder and going to there
$take hello-world

# create the build file
$vim build.gradle

# The content inside the build file
task helloWorld {
   doLast {
      println "Hello World"
   }
}

# Execute the task
$gradle helloWorld

# The output
Starting a Gradle Daemon (subsequent builds will be faster)
> Task :helloWorld
Hello World
You can see more about the task and doLast in the gradle documentation.
The build logic can use DSL (domain-specific language [groovy/kotlin]) or can mix in imperative logic The example used here was using groovy.
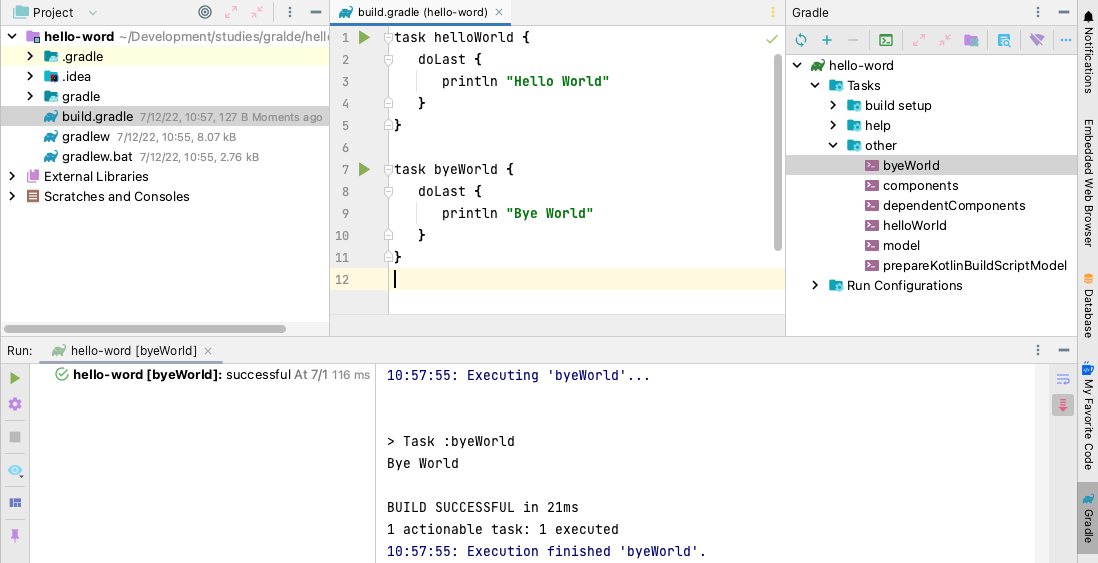
Here is the same result doing the execution by InteliJ.

Ad Hoc Task: simplistic action code by doFirst or doLast. Automatically extend DefaultTask. The previous example is one of this.
Task Declaring a Type: explicity declaration of a type. Not need define an action because the type define that. Here an example of this.
task copyFile(type: Copy) {
   from "sourceFile"
   into "target"
}
INFO!
org.gradle.invocation.Gradle represents invocation of the build.
org.gradle.api.Project represents a software component and provides API access to object hierarchy.
org.gradle.api.Task represents unit of work with potential dependencies.
Multi-Module Build
Grandle can handle more than one module. For that, we need to use the settings.gradle. It has to be in the root project and declare all participant projects. The same way, you can have a properties files regarding the project.
# create the settings file
$vim settings.gradle

# The content inside the settings file
rootProject.name = "starter-example"

# run projects
$ gradle projects

# The output
> Task :projects
------------------------------------------------------------
Root project 'starter-example'
------------------------------------------------------------
Root project 'starter-example'
No sub-projects

# create the properties file
$vim gradle.properties

# The content inside the build file
org.gradle.logging.level = info
version = 1.0.0
Lifecycle
Here is the lifecycle for every build.
- Initialization: evaluates settings file and sets up build
- Configuration: evaluates build scripts and runs configuration logic. Tasks are not executed, only configured.
- Execution: execute task actions in correct order.
Standard Source Code Directories
- src/main/java: production source code
- src/main/resources: resource files needed at runtime.
- src/test/java: test cource code.
- src/test/resources: resource files needed at test execution time.
- build/classes: compiled class files.
- build/libs: generated JAR file.